

Tutorial
Visual Basic 2008
Communicate with the KPM1000 series using VISA through GPIB, RS232C, or USB.
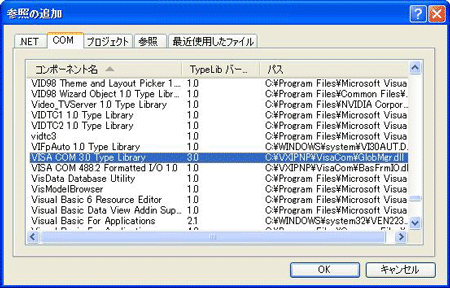
Setting the "Project"
First, set the communication driver (VISA library) for the "Project."
Click "Project" on the menu bar, then select "Add Reference" to refer to "VISA COM 3.0 Type Library."
Communication through GPIB, RS232C, or USB
After setting the communication driver, you can communicate with the KPM1000 through GPIB, RS232C, or USB.
The following describes the communication procedure using VISA.
Open the VISA
To communicate with a GPIB, RS232C, or USB device using VISA, you have to first open VISA. When you open VISA, specify the I/O resource.
Example: To open VISA by using USB
Set rm = CreateObject("VISA.GlobalRM")
Set msg = rm.Open("USB::0x0B3E::0x102E::00000001::INSTR", NO_LOCK, 0, "")
"USB::0x0B3E::0x102E::00000001::INSTR" is the I/O resource.
The I/O resource is specified by the following constructions. The part indicated with [ ] can be omitted. Enter the appropriate values in the parts specified in oblique characters.
| GPIB |
GPIB[board]::PrimaryAddress[::SecondaryAddress][::INSTR] Example: The primary address 3 of the measuring instrument connected to GPIB0. GPIB0::3::INSTR |
|---|---|
| Serial (RS232C) |
ASRL[board][::INSTR] Example: The measuring instrument connected to the serial port COM1. ASRL1::INSTR |
| USB |
USB[board]::VendorID::ProductID::SerialNumber[::InterfaceNumber][::INSTR] Example: The USBTMC measuring instrument with vendor ID (VID) 2878, Product ID (PID) 4142 and serial number "00000001." USB0::0x0B3E::0x102E::00000001::INSTR |
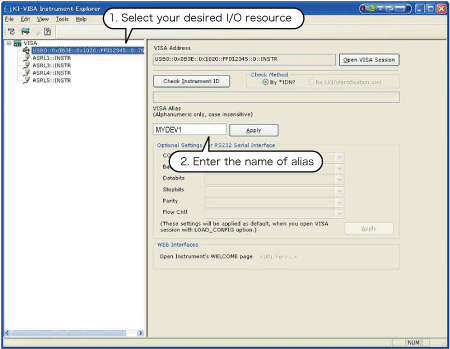
For VISA, the alias can be used for the I/O resource.
When using the alias for the I/O resource, even if the alias name is hard-coded directly in the application, the alias name can be easily converted to the appropriate I/O resource name.
Example: When using the alias (MYDEV1) for the I/O resource.
Set msg = rm.Open("MYDEV1", NO_LOCK, 0, "")
When the alias is used, the actual I/O resource is specified by an external configuration table. When using USB (example for KI-VISA):
In case of using VISA other than KI-VISA, please refer to the applicable VISA manual.
Controlling the devices
Next, use "Read" and "Write" commands to control devices.
Example:
msg.WriteString ("SENS:FILT ON") 'Turn the low pass filter on.
msg.WriteString ("INTEG:STAR ON") 'Start integration.
Closing the VISA
Close the VISA at the end.
A command for "Open" and "Close" of the VISA is required only once in the program.
msg.Close
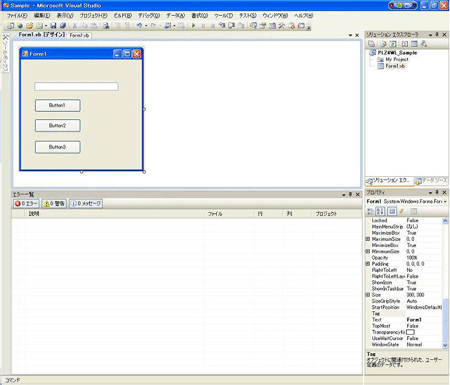
Sample program
Imports Ivi.Visa.Interop
Public Class Form1
Dim rm As ResourceManager
Dim msg As IMessage
Private Sub Form1_Load(ByVal sender As System.Object, ByVal e As System.EventArgs) Handles MyBase.Load
rm = CreateObject("VISA.GlobalRM")
msg = rm.Open("GPIB0::1::INSTR", AccessMode.NO_LOCK, 0, "") 'Example: GPIB
'msg = rm.Open("MYDEV1", AccessMode.NO_LOCK, 0, "") 'Example: Using an alias
'msg = rm.Open("USB0::0x0B3E::0x102E::00000001::INSTR", AccessMode.NO_LOCK, 0, "") 'Example: USB
End Sub
'Query the instrument identity
Private Sub cmdIdn_Click(ByVal sender As System.Object, ByVal e As System.EventArgs) Handles cmdIdn.Click
msg.WriteString("*IDN?")
TextBox1.Text = msg.ReadString(256)
End Sub
'Set the operation mode and voltage
Private Sub cmdCurr_Click(ByVal sender As System.Object, ByVal e As System.EventArgs) Handles cmdCurr.Click
msg.WriteString("SENS:FILT ON")
msg.WriteString("INTEG:STAR ON")
End Sub
'Query the instrument identity
Private Sub cmdMeas_Click(ByVal sender As System.Object, ByVal e As System.EventArgs) Handles cmdMeas.Click
msg.WriteString("MEAS:CURR:AC:INTEG?")
TextBox1.Text = msg.ReadString(256)
End Sub
Private Sub Form1_Disposed(ByVal sender As Object, ByVal e As System.EventArgs) Handles Me.Disposed
msg.Close()
End Sub
END CLASS